Mad Boris Russian Imperial Stout (and brewday walk-through)

Although I really like the Russian Hacker Stout, which I’ve made twice now, I opted for a new recipe from Brew: the foolproof guide to making world class beer at home, by James Morton. Simplified, here’s the recipe.

Mad Boris Russian Imperial Stout
15.5 lb Maris Otter
1.5 lb Carm/Crystal 80
1 lb Amber malt
1 lb Chocolate malt
1 lb Brown malt
—————————
1 oz. Magum (FW, 30 minute boil)
1 oz. El Dorado (FW…had it lying around)
—————————————————————
US-05 (two packs, just in case)

My brewdays are usually weeknights after dinner, or after my wife and I put our 3-year-old to bed around 7pm. I start by connecting an RV filter to my garden hose (carbon filter). I fill up the pot and crank the heat while it’s filling. Putting the lid on speeds up things, a lot.

IMG_20170621_192703501

While waiting for the water to reach 150ish, I mill the barley very fine (all 20 pounds for this beast). It falls into a plastic bucket beneath the mill.

IMG_20170621_192650050

Continue reading

Brulosophy Experiments I Have Embraced

I am a devoted follower and advocate of brulosphy.com, a group of guys that do legitimate scientific experiments on the homebrew scale. I stress on the homebrew scale because that’s what’s important and what’s original about the site – they are not trying to debunk the science of brewing; rather, they are simply showing that many of the techniques that apply to professional brewing don’t necessarily matter or make a difference on the homebrew scale.

capture

They have done over 100 experiments, and I take them all seriously. My cliff notes on the entire site: stop worrying so much; brewing good beer is easier than you thought; mind your water. At least that’s my interpretation.

These are the experiments I have incorporated into my normal brewing routine:

30 Minute Mash & 30 Minute Boil
I jumped for joy when I read these experiments. These are by far my two favorite techniques because they save the most time and, for me, guarantee a 2 hour brewday (and I’ve enjoyed 1:30 brew days). To brew a quality beer in under 2 hours on a Monday night or during my son’s nap- that’s a beautiful thing. In the official experiment, the author compared the same Oktoberfest, one mashed for 30 minutes and another for 60. Sadly a triangle test wasn’t done on this one, but the blind sensory panel was mixed and mostly split down the middle on which beer they preferred. They couldn’t tell the difference, although the author claimed to prefer the 60 minute mash (although he wasn’t blind to the experiment). Here he brewed a decent 2 gallon beer with a 15 minute mash and boil. Nice! Here he brewed a decent 5 gallon batch with, again, a 15 minute mash and boil (although he calls it “lifeless”). I think the recipe was to blame, honestly. Here they brew an 11 gallon batch and mash for only 20 minutes, a lager which turned out delicious and fooled everyone at a fancy homebrew conference. Here they brew a delicous hoppy NEPA mashed for only 30 minutes. Clearly cutting your mash by (at least) half works. I will honestly never go back. A few months ago, I was hanging out with a professional brewer that agreed: barley conversion, from starch to sugar, doesn’t take very long.

The first 30 minute boil experiment produced a hoppy pale ale that people couldn’t tell apart from the same beer boiled for 60 minutes (in fact the short boil beer was the overall preference). Then, amazingly, he compared a pilsner beer boiled for 30 and 90 minutes – which tasters could not tell apart! Pilsner malt is “supposed” to be boiled longer because of “DMS”. They send samples to the lab: no DMS.

No Sparge
Another huge time saver and benefit of BIAB, my sparging technique amounts to grabbing a sack of hot barley (with gloves), squeezing it for a couple minutes, and discarding it. Efficiency issues can be mitigated by crushing barley finer and/or adding more malt. Or not caring. Turns out the only brulosophy experiment on sparging was actually significant; that is, people could tell the difference between a Kolsch that was sparged and one that was not. But only half of those people actually preferred it over the other beer. Continue reading

Beer 25: Belgian Golden Strong, 25 m boil, with Vitality Starter

This was a clone recipe from Avery Brewing’s “Salvation”, a Golden Strong Ale. My first attempt at the style, and my first attempt at a new technique (more on that later) – and this beer appears to be really good. At least, that’s what several of my homebrewing friends have told me, and I trust their palates much more than mine. I should note that I’m still very knew at brewing and at tasting different styles, so I refer to my local homebrew club for advice. So, not knowing what a Golden Strong is supposed to taste like, I thought I had detected a little corn, which is considered an off-flavor. However, all my homebrew friends said it was on point, on style, and tasted good, which made me happy. I also tried a a commercial example, and it tasted exactly like mine. This is a simple, highly drinkable, high alcohol beer. You get a little banana and clove from the yeast, but not much; you get the ‘graininess’ from the malt, and it’s shockingly smooth going down. This is a dangerous beer to drink, my friends. I’m not sure what the crystal malts actually did to the beer; it’s certainly not sweet.

IMG_20160824_200032388 (1)

Belgian Golden Strong Ale (5 gal.)
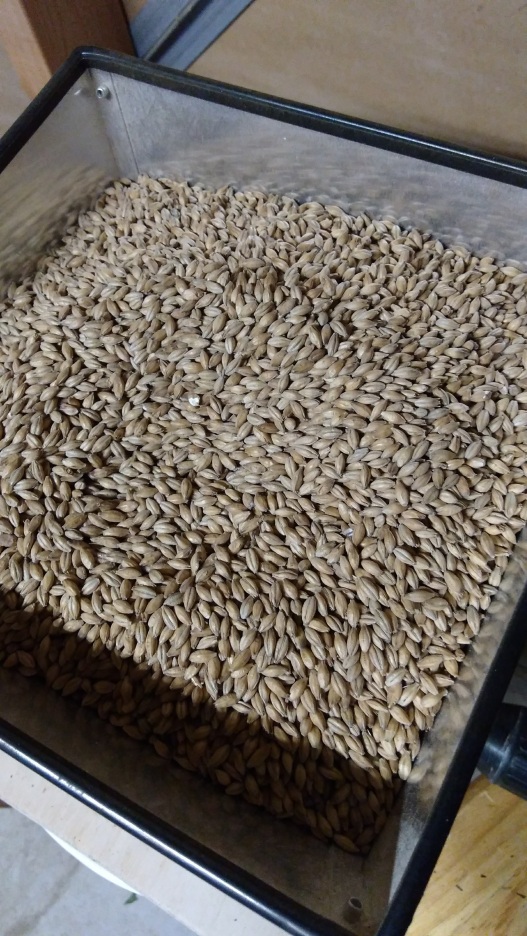
12.6 lb. 2-Row
3 lb. Pilsen (BE)
.6 lb. Caramel/Crystal 20L
.6 lb. Caramel/Crystal 10L
1.2 lb. Corn Sugar (@ flame out)
——————-
2 oz. Sterling (@ flame out)
2 oz. Fuggle (@ flame out)
——————-
Abbey Ale Yeast (liquid, with vitality starter)

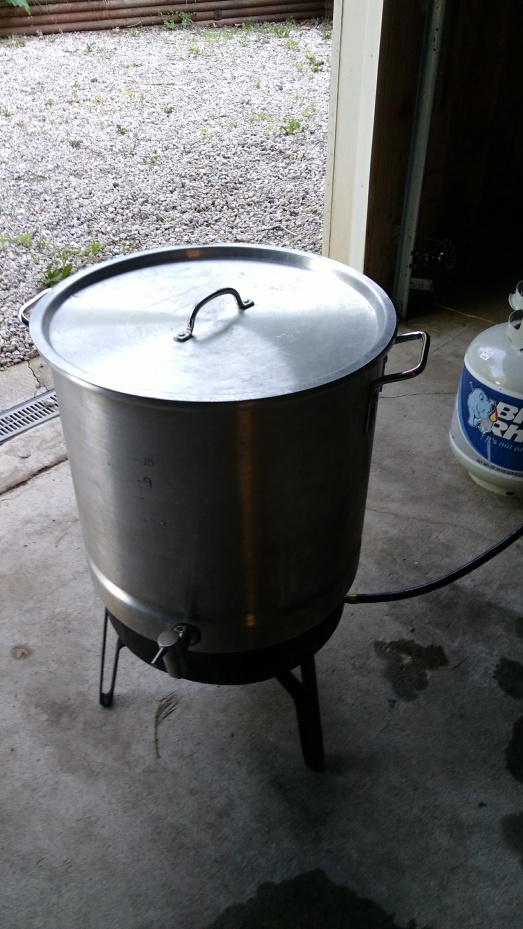
So the process with this beer was pretty standard. I started with 8 gallons of water, heated the water quickly to 149.5F mash temperature. I soaked the barley for 30 minutes, stirring several times during the mash. I crushed the barley fine for greater efficiency. After 30 minutes of soaking, I went ahead and squeezed the bag of barley, discarded it, and quickly got to a boil. Because of the low bitterness, I only boiled for 25 minutes. I also decided to only add hops at flame out, which gave me a pleasantly low amount of bitterness. I used a wort chiller for about 7-8 minutes, which lowered the temperature to about 120 degrees, and then put the hot, unfermented beer in a freezing cold upright freezer to finish off. One hour, 30 minutes exactly. After about 4 hours of passively chilling, the beer was at 73F – close enough for me to pitch the yeast and let the temperature ride to my desired fermentation temp of 70F. With Belgian beers, I like to ramp the temperature up during fermentation, so two days after brewing I ramped up to 75F, and two days after that, 80F. As usual, when fermentation was complete, I cold crashed, added gelatin, and bottled. As usual, I never had to move the pot of beer throughout the entire process.

Oh wait. I forgot to talk about the yeast.

‘Vitality’ starter is a concept I got from brulosophy.com, where admittedly all my ideas come from (except for One Pot Brewing, that’s mine). Instead of making a traditional starter two or three days in advance, which involves planning, equipment, and time; with a vitality starter, the goal is to wake up the yeast up on the same day you are brewing. It gets the yeast horny and ready to go. Right up my alley. Here’s my interpretation. After mashing, I filled up a few sanitized glass jars with hot wort. Then, after cooling to around 70F, I put the yeast (in this case, Abbey liquid) into one of those jars, saving the others for future batches. I simply let the yeast sit in the jar full of wort until it was time to pitch, about 5 hours later. Did it work? I think so. The next morning I noticed a nice foamy krusen starting, something I am not used to with liquid yeast. Liquid yeast, having far fewer cells than dry yeast, is the only reason I would use this method, especially using liquid yeast with high alcohol beers.